Alundra - Part 66: Lost In Murgg Woods
Written on Saturday, March 12th, 2016
Posted on Saturday, August 22nd, 2020
3 min read
This means all the portals in the entire map have been unlocked, yessss!!!
The Willow Bow is also chargeable too!! Let's see this thing in action! I try the bow on mushroom outside...the charge attack looks like a magical arrow from a show I'm familiar with...
I head down the steps into another tunnel...
I'm now in another part of the dungeon here, and it seems like I'll get locked in just at the next chamber. There's a Murgg there...
Murgg: "Welcome, furless one! Welcome to the end of your miserable life!"
The Murgg shuts the gate behind me, and three more buddies jump down!
After taking care of them, the gate disappears!
Unfortunately, another Murgg halts my way back out!
"Warm sticky life fluid!?" Nice, but long euphemism. He explodes the wall on the east, where seven more Murgg join the fray!
The gate opens after taking care of all of them with the Fire Wand!
I head to where they came from, through the wall and use the teleporter to warp to...
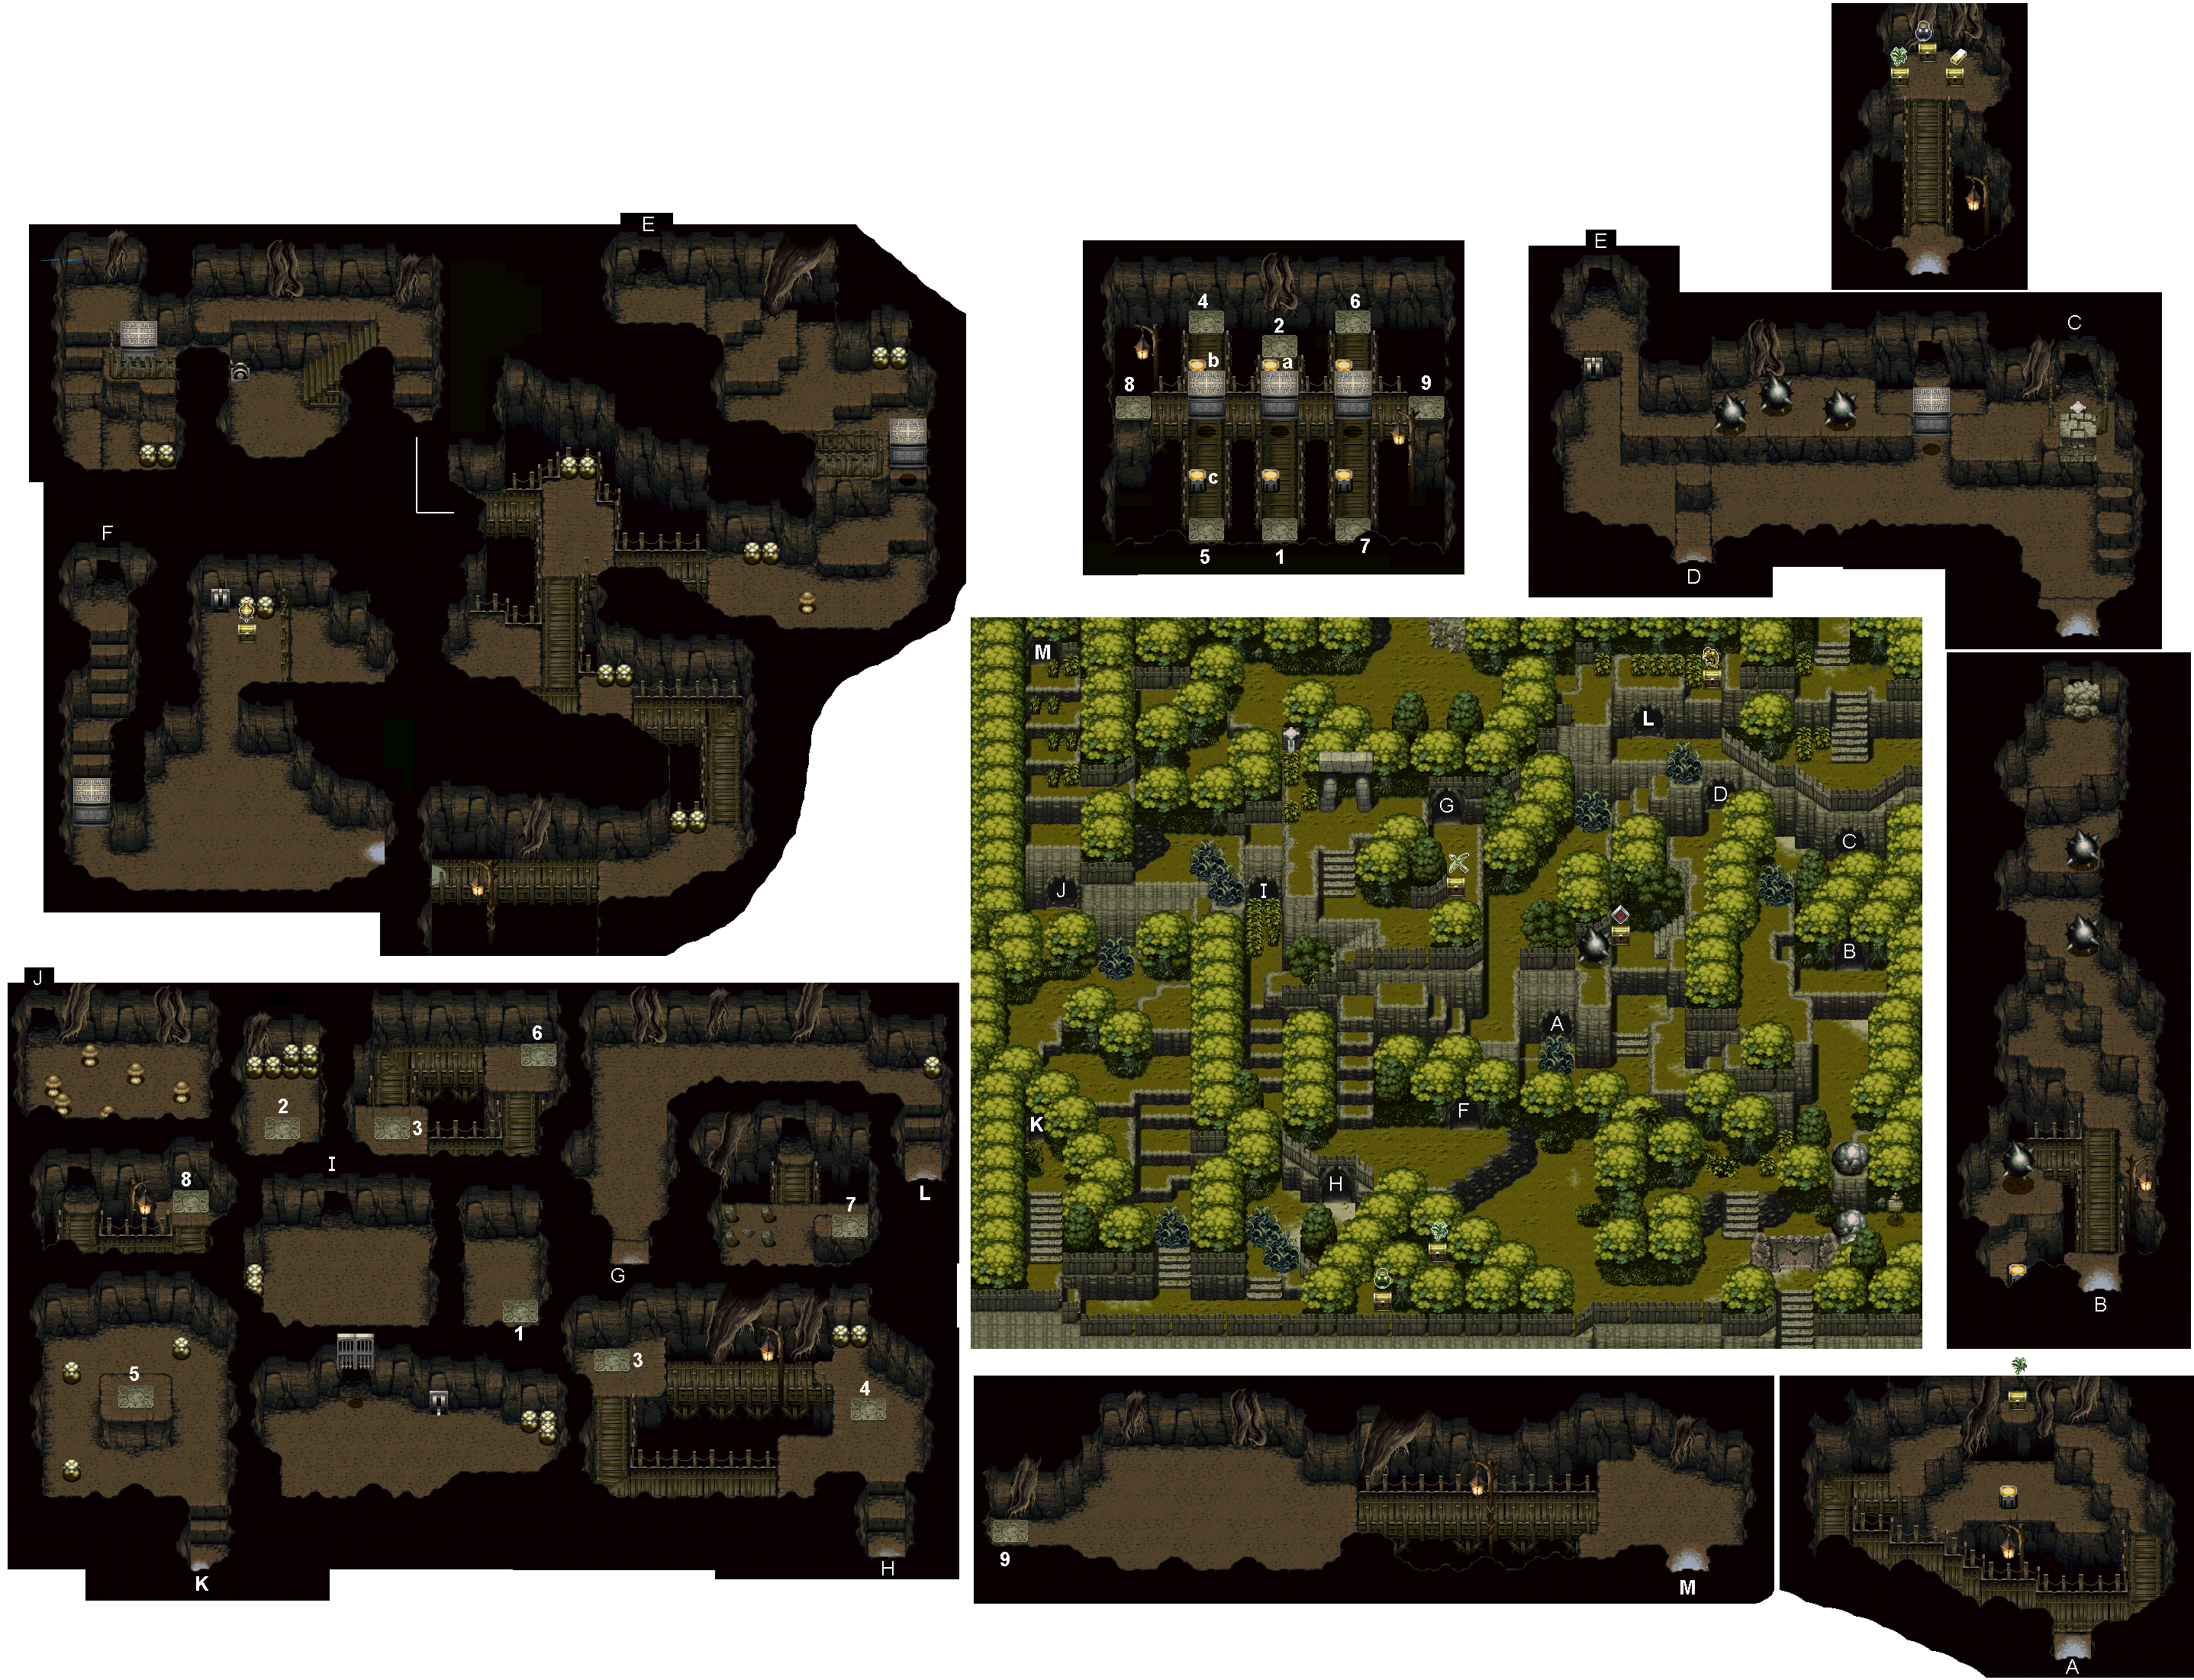
...a room with three bridges, three big blocks, and six switches, two on each side of the three blocks. I'm currently in the middle bridge.
I press the south switch, which does nothing, and the north switch there, lowering the rightmost block.
I warp forward, where I'm in a room of jars! I head to a passage east of the pad, and warp with the next one!
A rumbling room! I warp back and fight the Murgg in the previous room.
I take care of another set of reinforcements plus one archer, and teleport using the northeastern pad in that room.
I'm at the bridge to the right, where I press the switch there to raise the right block again.
I head south and press on that switch, which lowers the left and raises the middle block.
I warp to a chamber where a recovery triangle awaits. I step on it, and three Murgg drop down from the bridge in the room!
After a few scrapes, I'm now back outside near the arch portal, and after I burn more thorns on the other ledge, I jump forward.
Eventually, I make it to the second chest that I saw and open it, which has a Strength Tonic.
I head into the tunnel north of the chest.
It's the rumbling room I was warped to before!
The Murgg here keep on coming!
I warp to the top-right teleporter and I'm at the left bridge of the bridge room this time. I press the north switch, raising the block here, and lowering the middle.
I then press the south switch, which lowers the left block.
I'm now on the high part of the ledge in the middle of a Murgg wine banquet! And they're drinking monkey wine!
Murgg: "We will guzzle no wine before its time..."
They've spotted us!
After taking care of them, I head outside! I'm now in the western part of the woods, which I crossed on the way to get the Tonic!
I head north and into the tunnel into a bed of dangerous mushrooms, and their spores!
Some of them are harmless, while the rest try to spore me out!
I head south into the tunnel, and cross the bridge to the teleporter.
I'm now back at the bridge room, at the top bridge!
I should've hit the top middle switch!
I escape outside and try again, fighting off the mushrooms on my way out!
I figure out the effect of all six switches in the bridge chamber.
1...3...5
A...B...C
2...4...6
1 - lowers B, raises A
2 - lowers A
3 - lowers C, raises B
4 - raises A, B, and C
5 - raises B and C
6 - raises B, lowers A
After lowering all three blocks, I head back outside, and make my way to the portal chamber and save my progress!
I go ahead and cross the top bridge to the other teleporter.
Now I'm in a huge chamber. I'm sensing a boss battle here...
Since there's no one here I move to the bridge eastward, but an army of Murgg stop me! One has a boomerang, while the other four have their claws!
They refuse to give their wine away to us "furless ones"! Alundra turns back but five Murgg archers drop down! Time for a ten-on-one battle!
Taking a lot of damage, I take care of all ten and head forward!
Now I'm outside again as I walk down the ledges push a column east near the arch portal, a good shortcut back. Afterwards, I head east to open a chest containing another Gilded Falcon.
After saving again in the portal chamber, I head north to where the Great Tree stands!